The Reason your Homemade Soap is Turning White is Soda Ash
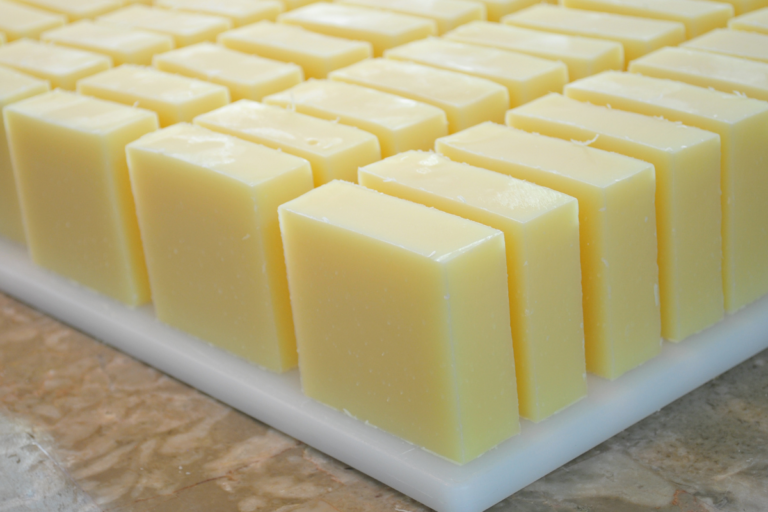
If you are reading this post you have obviously delved into the world of homemade soap making and have created your first few batches and have found that there is some whiteness appearing on the surface. You might not be sure what it is, or why it is happening, so this post will explain, that your homemade soap turning white is not a huge issue, is not dangerous, and is easily preventable and rectified.
Your handmade soap has turned white because of a disproportionate mix of fats and Lye in your soap batter. The whiteness is unsaponified lye releasing soda ash because of the reaction between the lye and carbon dioxide in the air. You can still use the soap.
While the soap is still perfectly ok for use once you rinse the film off, you may want to take some measures to try to prevent it from happening on future batches, as well as find out more about the process and science of why it happens – Read on.
Why Your Soap Is Turning White
While this particular happening is strange, it comes down to science. When the lye in your homemade soap is exposed to the air, it meets carbon dioxide. These two elements interact to create a layer of sodium carbonate, which most often appears as a light white, uneven dusting on the surfaces of your soap.
It may be on top at first until you cut into bars, at which time it may creep up on all edges that are exposed to the air. It can develop just hours after you uncover or slice up a fresh batch.
While it’s not detrimental to your soap, nor is it harmful in any way, it can be unsightly and interfere with enjoying the finer design details you put into your handmade soap.
Note: white spots or streaks inside or throughout your soap is likely a different problem and not soda ash.
What can cause or intensify the whitening on the surface of the soap?
- Tap water. Using tap water in your soap means you’re also using the impurities naturally found in tap water in your soap. These trace elements can react negatively during the process of making soap, which increases the risk of soda ash development.
- Exposure to air. The whole reason soda ash occurs is that the lye reacts with carbon dioxide. The air we all breathe is where the carbon dioxide is, so this is self-explanatory: exposure to air contributes to soda ash formation.
- Cool temperatures. Soda ash likes colder soaping temperatures. When your oil and lye solution is cooler, or if you’re making soap in a cold area, ash can be more likely to form. A room that’s 50°F (10°C), for example, is pretty chilly and will likely contribute to the formation of soda ash. Oil and lye temperatures below 95°F (35°C) are prime conditions for soda ash to form. Some experts even say the threshold is 85° F (29°C).
- Poured at thin trace. Some swirl designs, in particular, require thin soap, but pouring at a thin trace can set you up to be more likely for soda ash. This means you’re pouring when the oils and lye water have just emulsified. If you let it go, it will continue to thicken over time, which is a better time to pour.
How to Remove the White Film From Your Handmade Soap
The good news is that the layer of soda ash is not only harmless but also removable.
Rinse It
Perhaps the most straightforward solution once soda ash has struck is to gently rinse your bar under running water or dip it in a water bath. Even if you choose not to remove your soda ash, the white layer usually washes away during the first or second regular use of the soap as it gets rinsed with water during use.
Steam It
A simple handheld steamer you’d use on a blouse will also whisk away that dusty white layer on your soap. If you don’t have one available, you can also very carefully hold your soap in the path of steam from a boiling pot of water or whistling tea kettle. Take care to protect your skin so you don’t suffer steam burns.
Shave or Dab It
Using a soap planer, you may simply shave away the affected areas to rid your bars of that white dust.
You can also try blotting a dash of rubbing alcohol on a lint-free cloth and rubbing gently over the surface of the soap. Rub in one consistent direction to keep the surface looking polished and smooth, and the ash will come right off.
Deal With It (and Learn to Love It)
Rather than changing your formula and technique or trying to remove the ash, why not change your perception and embrace that powdery addition to your soap? Some soap makers use soda ash to their advantage and plan it into their design, using it to soften the colors and accentuate texture across whipped peaks on top.
Maybe if you leave the soda ash as it lands, you’ll learn to love it as part of the charm of an always unique handcrafted product — and others will too.
Tips to Prevent Soda Ash
Here are some tips so your next batch of homemade soap doesn’t turn white.
Use Pure Water
Since tap water can contain too many added minerals and impurities that throw off your soap recipe, instead, try using deionized, distilled, or reverse osmosis water. The use of pure, filtered water should simplify your recipe and eliminate this factor as a possible contributor to soda ash.
Cover It Up
The more you can protect your raw homemade soap from the air around it, the better. It’s not realistic to completely prevent air from getting at the surface of your raw soap, so just do your best to limit it when you can.
After it’s mixed and poured, cover your soap to keep the air out as it cures. A piece of saran wrap over the edge of your mold, a storage tub with a lid to put your whole mold into, or even a piece of plywood over the top will work fine to keep the air out. Just make sure your lid or cover doesn’t touch your soap.
Especially if you’re working in cooler temperatures or during a colder weather season, leave your freshly-poured soap in its mold for at least three whole days, and even better, up to a week, before you uncover it.
Turn Up the Temperature
Temperature can be a tricky thing, as it’s a bit subjective based on what works for different people, various recipes, and depending on the climate you’re making soap in. Since soap making at colder temperatures can contribute to more soda ash, aim to turn up the temperature a bit. Oil and lye temperatures around 95 to 110°F (35 to 43°C) are ideal for beautiful, ash-less soap.
Pour at Medium Trace
After warming up your lye and oils to the ideal temperature, try pouring when the mixture is closer to medium trace or even leaning towards thick. We’re talking gravy to almost pudding consistency. For many soapmakers, this makes a big difference in eliminating soda ash.
Conclusion
If your homemade soap turning white had you starting to worry, hopefully, the information in this article has put your mind at ease. That pesky white layer is understandably frustrating, but it is purely cosmetic, harmless, removable, and preventable. Good luck with your next batch of handmade soap, and may it be your best yet!
A Few Essentials and My Favorite Things
Because there are so many places to find and so much information to go through on-site, I thought I would bring a few of the most popular items from the site, and my favorite products all in one place so you can check them out easily.
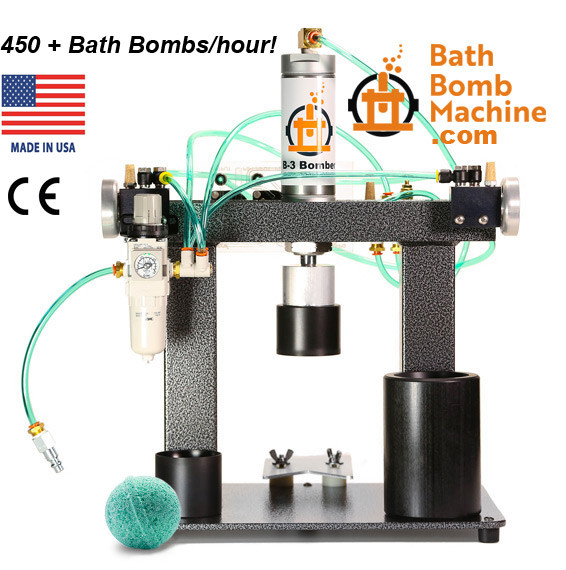
Bath Bomb Maker
Take your bath bomb making to the next level and go from making 10 in a day to 10 in just a few minutes. The B-3 Bath Bomb Machine is the best on the market and helps turn around orders in super quick time
Bath Bombs for Men
Go figure this is the most popular area of the website, guys love bath bombs or you ladies like buying them for him.
Dehumidifier
The biggest problem often for bath bomb makers or soap makers is the humidity. This 4500 Sq Ft model from Amazon, is more than big enough for most bath bomb makers and can be used for the entire basement or anywhere else in the house.
Scales
The one thing you will need if you are making bath bombs, shower steamer or homemade soap is some good and reliable digital scales so your measurements can be as precise as digitally possible. These Kitchen Scales are from Amazon’s Choice, and they are mine too, as they are solid, reliable and inexpensive.
I hope you find everything you have come to Bath Bomb Guide to look for and enjoy the site.
My Favourite Bath Bombs
This is my favorite bath treat set from Amazon which includes a bath bomb, salts, and more, It is the perfect all-round package, all of which are included here on the bath bomb guide site, in the various sections
Turkish Cotton Towels
My towels are one of my favorite things. A soft, fluffy Turkish bath sheet to wrap up in is the best compliment to a bath or shower. Sometimes I just take it out of the cupboard and wrap up on the couch watching TV! Being Turkish cotton they last really well.
